How to Make Your Own Notebook? A Complete Guide for Everyone.
Do you need a notebook that looks exactly the way you want? The perfect size, the right ruling color, the right paper type — maybe dot grid, maybe lined — and on top of that a personalized cover that stops people in their tracks? The good news is that making your own notebook is easier than you think, and with a little planning you can create something truly special. In this article I'll walk you through the whole process step by step.
Why make your own notebook?
Before we get into the details, it's worth asking: why bother making a notebook yourself when you can buy one ready-made in any shop? There are a few good reasons:
- Price – a 16-page DIY notebook costs around €0.25, and a 32-page one around €0.40.
- Ruling – I couldn't find 16-page dot-grid notebooks anywhere, yet that's exactly what I need for notes. With my notebook generator you can have any ruling, color, margins, and extras you like.
- Cover – you'll finally escape those flimsy, ugly covers. With my cover generator you can make yourself a gorgeous cover.
- Paper – choose exactly what you need. Writing with a fountain pen? Markers? You don't have to settle for whatever the shop stocks.
On top of all that, handmade objects are just different. They have something you can't buy in a store. You treat them differently — with more care and respect. When a child has a handmade notebook they made themselves, they approach it completely differently than something off a shelf. And — not unimportantly — your own personalized notebook is often simply cheaper than branded notebooks with designer covers (I'll soon write a post on how to make a thick notebook with a hardcover binding).
Notebooks are also a great gift idea, perfect for creative workshops with children, or simply a way to express your personal style. You don't have to compromise on quality — with the right tools the result can be absolutely professional.
What will you need?
A stapler
You'll want a stapler with a rotating head (a "saddle stapler" or "booklet stapler"). It lets you swing the head 90°, so you can slide folded sheets inside and staple right along the spine fold — just like a real booklet. This is one of the simplest and neatest ways to bind a homemade notebook.

You can pick one up for as little as €3–4. I use one that cost me about €5 and it's perfect. You can also sew the binding with a needle, but it takes more effort and skill, and works best for thick notebooks (which usually need gluing too). Regular soft-cover notebooks just need staples.
Interior paper
The simplest choice is standard A4 paper (80 g/m²), folded in half to get A5 — the most popular notebook size. You can also choose a different format depending on what the notebook is for.
How many sheets do I need? A 16-page notebook requires just 8 A4 sheets. For a slim notebook use 8–16 folded sheets (giving 16–32-page notebooks); for something thicker you can use more, but keep in mind that the more pages, the more powerful stapler you'll need.
Cover
The cover should be heavier paper — around 250 g/m². You can print your own design or use colored card stock. Ribbed heavy paper (grain running along the longer edge) is an excellent choice as it will be very durable.
A printer
Making your own notebook (unless it's plain, unruled pages) really only makes sense if you have access to a color inkjet printer. Laser printers coat the paper with toner and aren't really suitable here — the pages would smudge your pen or fountain pen, and the cover would wear through during use.
How to make a notebook step by step
Step 1: Design the interior
Before you print anything, decide what kind of ruling you want inside:
- Blank – perfect for drawing or writing with a fountain pen (Kafka used plain notebooks)
- Squared / graph – the classic, great for maths
- Lined – ideal for writing, keeping a journal, or a recipe book
- Dot grid – a favorite among bullet journal fans and anyone who likes to write freely
- Special layouts – e.g. recipe pages, weekly planner, pages with margins, decorative floral pages, etc.
On my site you'll find a notebook interior generator that lets you create a fully personalized interior in just a few clicks.
All you really have to do is pick a ruling type and click "Download PDF." Each pattern automatically applies other settings I've fine-tuned on my own notebooks.
A perfect solution if you want, say, a handmade recipe notebook with a custom page layout, or a notebook for a child with larger squares.
Step 2: Print the pages
Print the prepared pages. The generator supports an opacity setting so that the printer uses a minimal amount of ink per page.
Note: the PDF automatically downloads with 2 pages for double-sided printing. When printing, set the number of copies to match the number of sheets your notebook will have, and if the notebook has bottom margins, enable "flip on short edge" rotation.
Fold each printed sheet separately and crease the edge firmly with something hard. Then nest them inside one another.
Step 3: Design the cover
My site also has a cover generator that lets you create a cover in one of three modes:
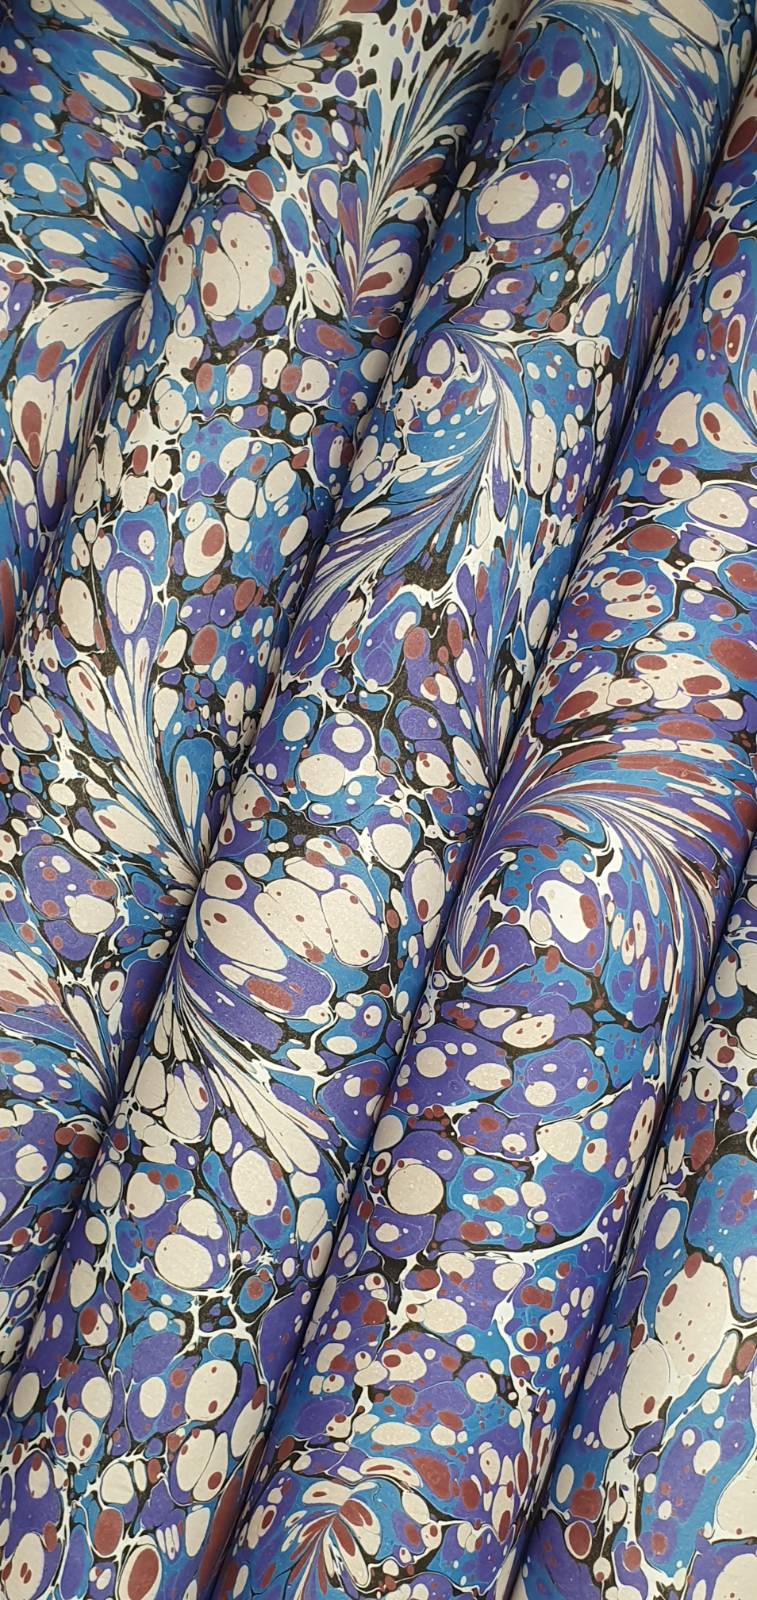
Marble mode

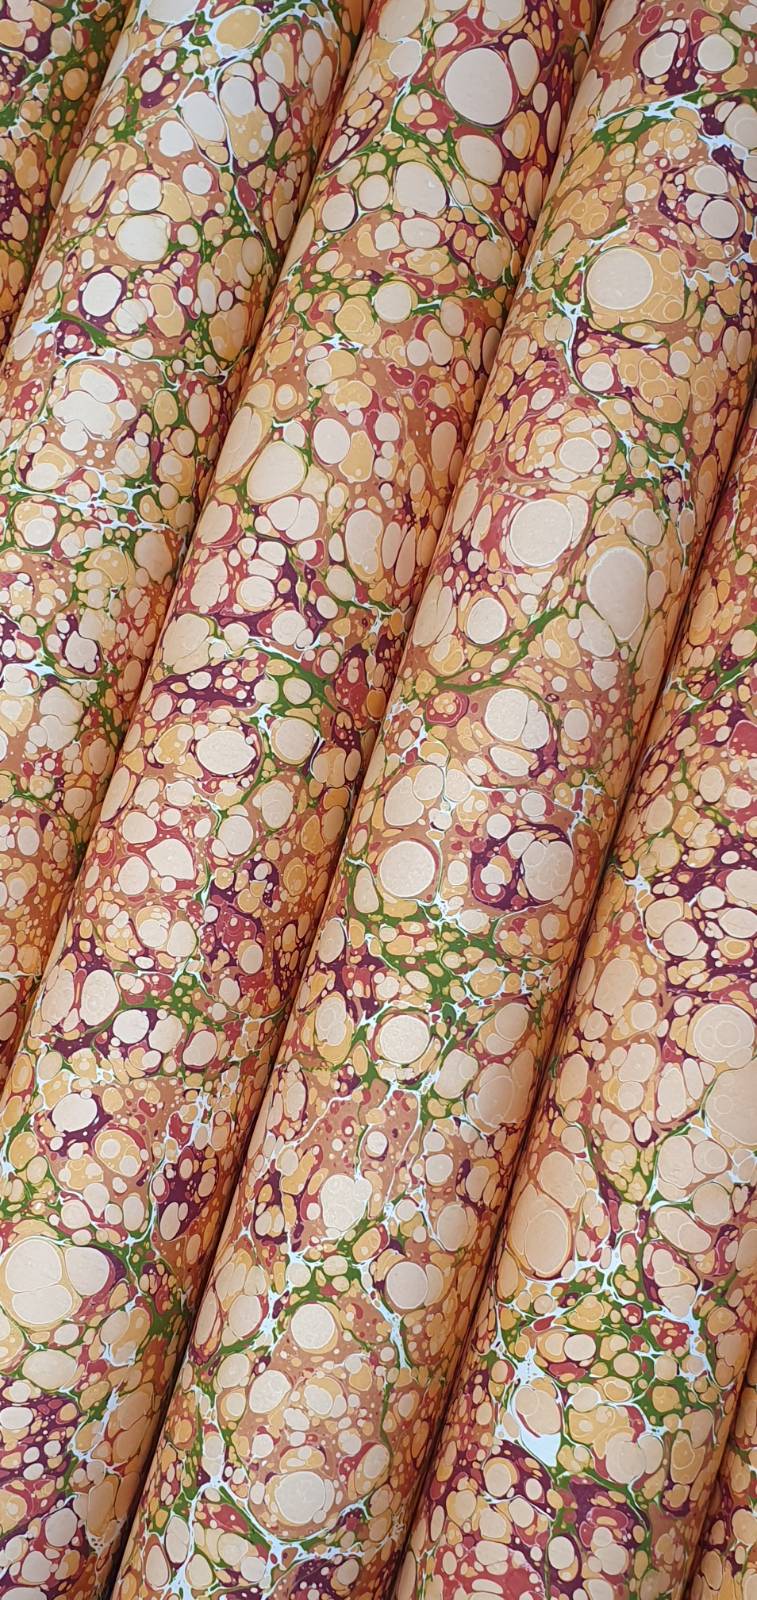
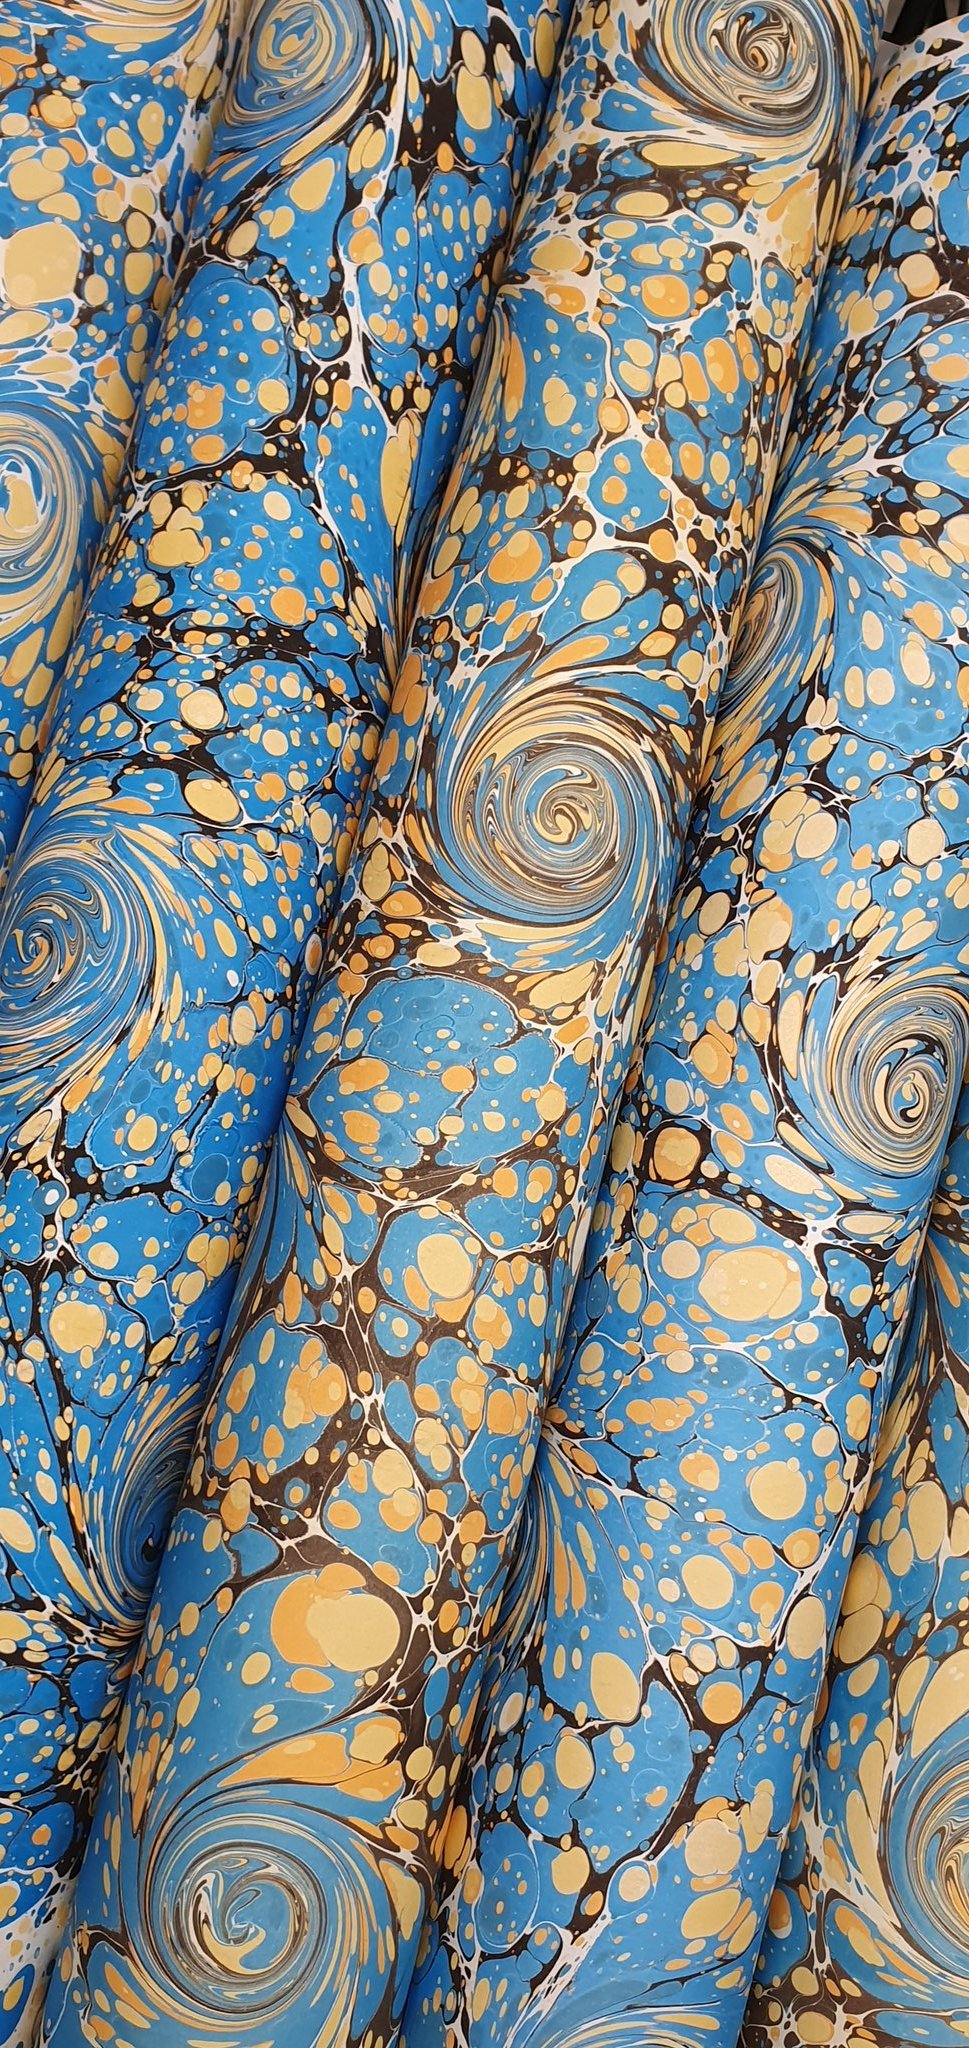
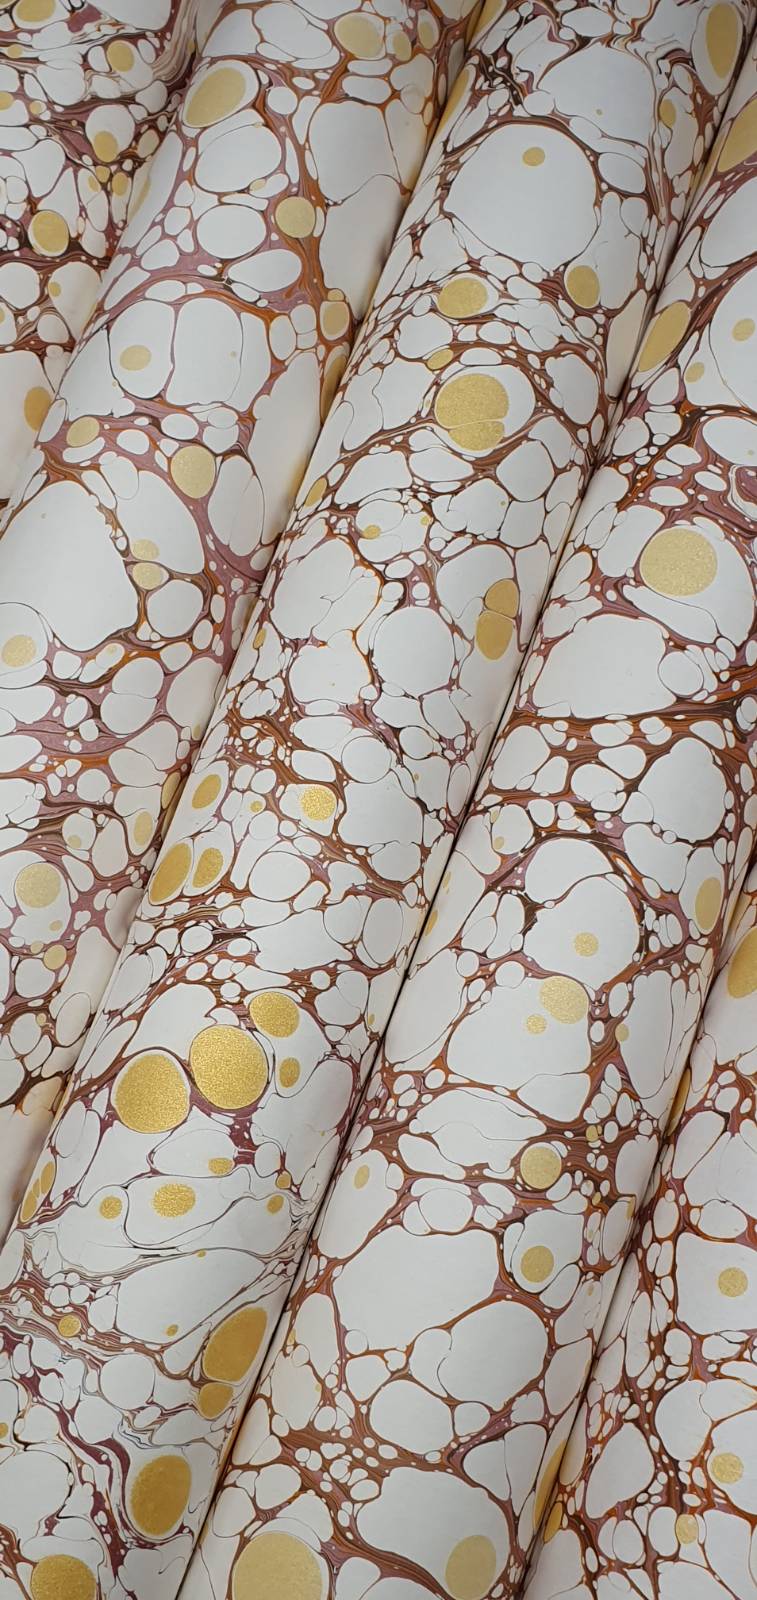
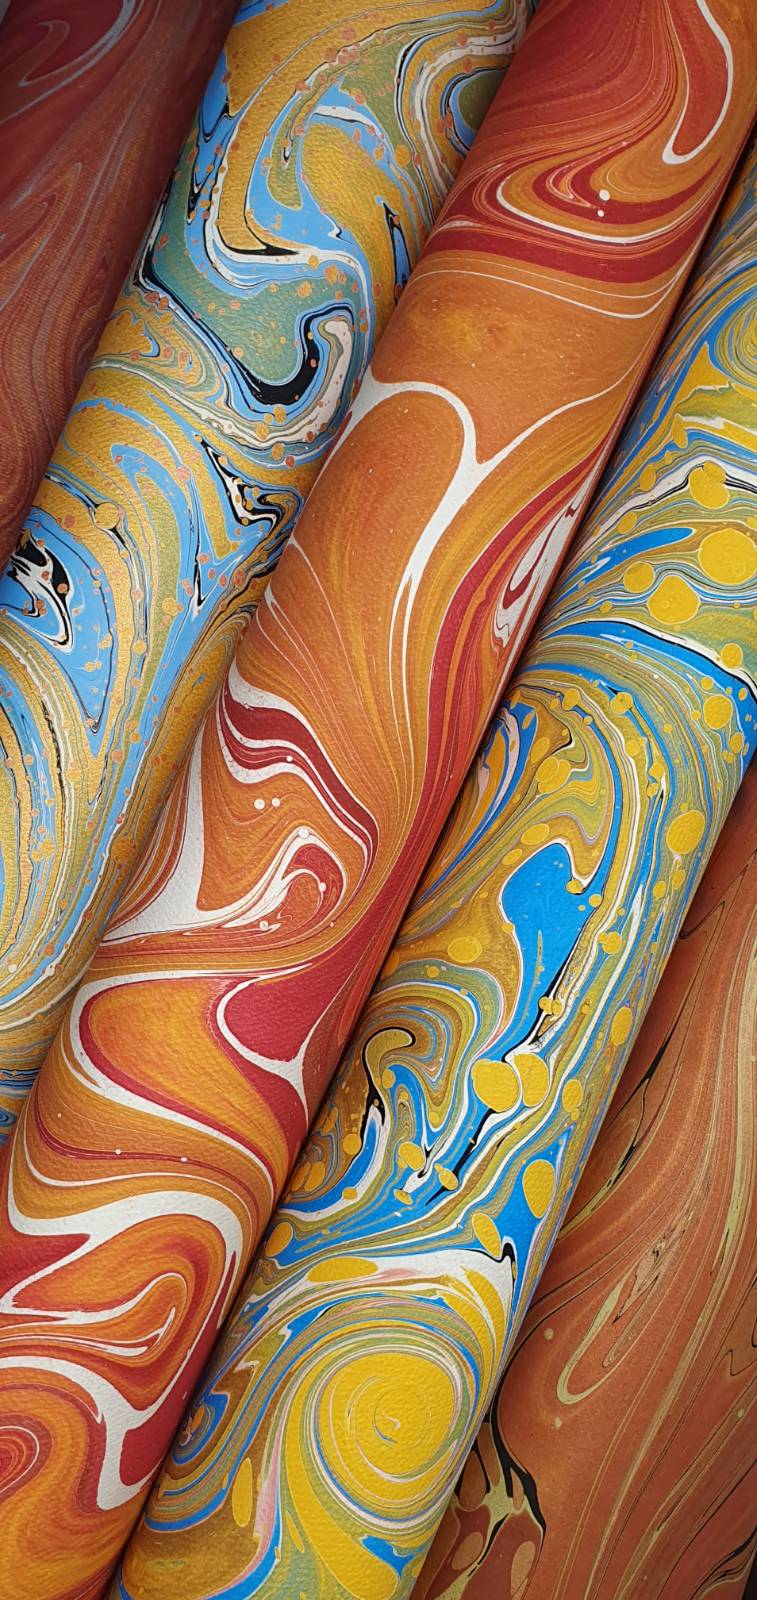
The marble patterns I offer draw on the tradition of hand-marbled paper — a centuries-old craft still prized by lovers of beautiful books and notebooks. Every pattern is unique and gives a notebook an elegant, artistic character — no shop-bought notebook will look this good.
- choose from ready-made scans of marbled paper (marbled paper is my specialty! You can also make it yourself),
- add your own graphic elements and text,
- adjust the color scheme to your taste,
- generate a finished PDF in the right size — ready to print on heavier paper or card stock.
Pattern mode

The patterns available here are inspired by so-called "paste paper" and "domino paper" — papers famous among bookbinders that traditionally decorate the insides of books.
- Use the zoom control to tile and multiply the pattern template.
- Add your own photos to place, for example, your logo on the cover.
- Edit pattern colors and save your version (patterns are saved only on the device you're using).
Fun fact: every pattern is generated by scripts using mathematical expressions. If you're a maths, physics, or programming teacher, this is a fantastic way to bring dry theory to life and run a workshop with young people. Explore the educational power of p5js.

You can print the cover on a regular printer, a photo printer, or have it printed at a local copy shop. Anyone can design a fully personalized cover exactly to their taste, regardless of graphic design experience.
Step 4: Assemble the notebook block
Fold the printed sheets in half and arrange them in order. Make sure the pages are aligned and the folds are sharp — use a ruler or the back of a wooden spoon to get a precise crease.
Step 5: Attach the cover
Place the printed and trimmed cover around the folded block. You can glue it on the inside with a thin layer of bookbinding glue or PVA, or staple it together with the block in the previous step.
You can also laminate the cover (at a copy shop), which will make it resistant to dirt and give it a professional finish.

Step 6: Staple the notebook
Time for the stapler! Slide the folded block of sheets into the rotating-head stapler and staple along the spine — usually two staples are enough: one in the upper third of the spine, one in the lower third.

If you're using a long-reach stapler, lay the folded sheets flat and staple from the outside in — the staples will land right on the fold.
Make sure the staples are pressed down flat and don't protrude beyond the edge of the pages.

Step 7: Trim the edges
Each successive sheet shifts outward by the thickness of the paper. It seems like nothing, but even in a 16-page notebook (8 A4 sheets) it's worth trimming the outer edge to even up the pages. This lets you flip through the entire notebook smoothly.
You can do this with a craft knife and a metal ruler.

Ideas for decorating your notebook
A finished notebook is just the starting point. Here are a few ideas for extra decoration:
- Ribbon bookmark – glue a thin ribbon to the top of the spine before attaching the cover
- Beautiful pages – print one page with a botanical illustration or another piece of artwork. You'll find plenty of free sources on my site.
- Label – a printed label on the cover with the notebook's title — you can design one in the generator
- Marbled paper as an endpaper – patterned paper glued to the inside of the cover gives a notebook a distinctive character. You can buy marbled paper from me.
- Protective corners – metal corners, like on old photo albums, give a notebook an elegant look, though they're more useful for hardcover notebooks.
- Rounded corners – use a corner punch to round the corners. Your notebook will last longer as a result.
A handmade notebook for a child — a brilliant idea!
I wrote this whole guide because I couldn't find a 32-page dot-grid notebook anywhere, and the few I did find cost a fortune.
Making your own notebook is a wonderful activity to do with children of any age. Younger kids can help, older ones can do it on their own — and they'll be proud of it.
A handmade notebook for a child is so much more than cheap shop tat. It's also a great way to develop creativity and practice fine motor skills.
Summary
Once more — I encourage you to make your own notebook. For me it now takes 3 minutes and costs next to nothing.
👉 Go to the notebook interior generator and create your first design right now. 👉 Design your own cover — pick a marble cover or create your own pattern.